Track Automation on Project Page
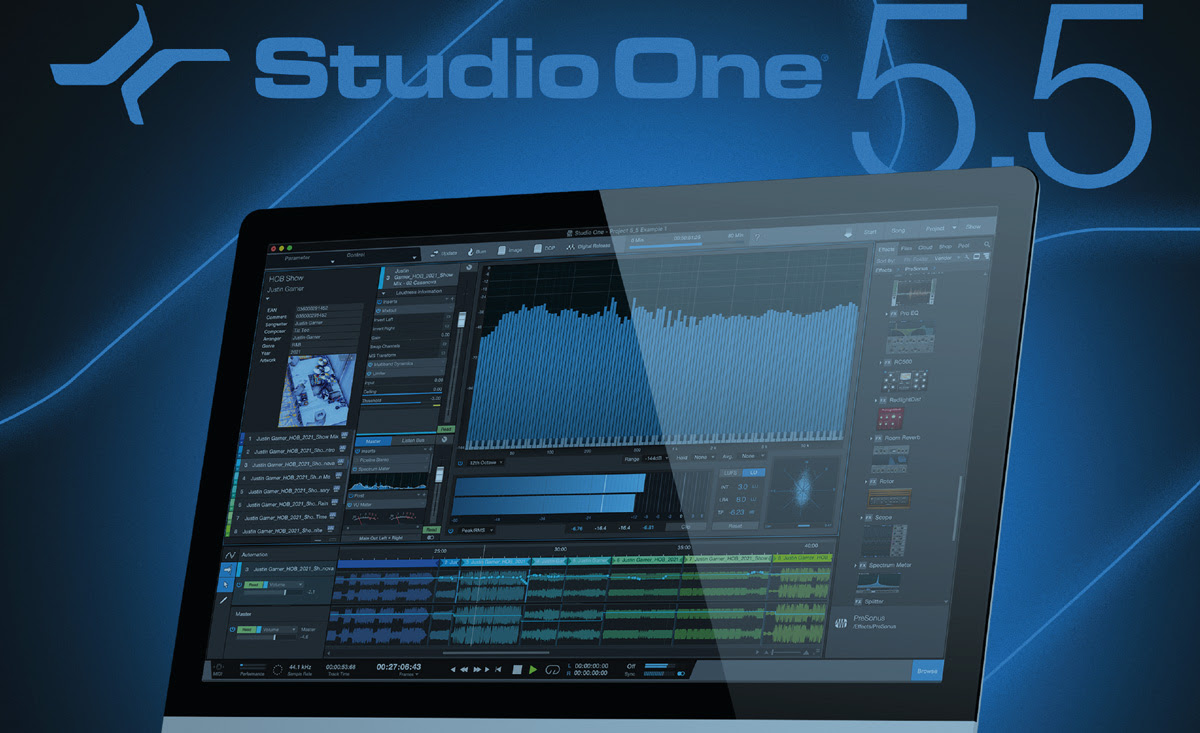
Studio One 5.5 introduces the #1 feature request for the Project Page: Automation is here! This new feature lets you automate track and master volume, as well as any Plug-in parameter, either in real-time using your mouse or hardware controller, or by using the familiar tools, including the powerful Paint Tool with its eight different modes. Apply volume automation to your liking; implement some gentle compression over time to bring some lift to your choruses; or dynamically tweak your tracks’ stereo width for a consistent stereo imaging across your entire album.
Once created, automation data can be modified in different ways, including via the useful bracket tool, transform tool, or by editing the shape of automation lines and curves directly with the Arrow tool. Adding an automation lane for a specific plug-in parameter is a two-click operation. Automation is available for individual track and master volume, as well as any track insert effects plug-in or plug-ins on the Master bus.
Clip Gain Envelopes on Project Page
Clip Gain Envelopes are now available on the Project page so you can precisely fix gain issues while mastering without using dynamics plug-ins.
Clip Gain Envelopes are the perfect tool for correcting sections of audio that are either too loud or too soft without adding a Compressor or Limiter plug- in. Add breakpoints to the Gain Envelope simply by clicking on the curve and dragging the point to your desired location. Changes to the clip gain are instantly reflected in the audio waveform so you have a reliable visual display of the overall level. Clip Gain Envelopes are sample-accurate, so they can be used to fix everything from entire voiceover takes to single clicks and pops.
Listen Bus on Project Page
The Listen Bus is now available on the Project Page, allowing you to monitor through a separate output with separate effects while keeping the Master output unaffected. This way, you can use popular room correction plug-ins such as Sonarworks Reference or headphone monitoring tools such as Waves Abbey Road Studio while mastering or mixing.
Track Transform on Project Page
Track Transform is now available on the Project Page as well as the Song Page. Track Transform lets you create rendered files of your mastered track, with every insert effect and automation parameter printed into the file — reversibly and non-destructively. This lets you reduce the computer processing power required of your session without committing to a mastering decision permanently.
Multiple format export for Digital Release
The Digital Release window on the Project Page now features a list of available audio formats which can be exported in a single pass — with no additional rendering time! Each format remembers its own export settings, so you can export your mastered album in high-resolution, 24-bit/96kHz WAV and AAC for streaming at the same time!
Target Loudness on Digital Release
The new Loudness options in the Digital Release window of the Project Page let you set target values for loudness and true-peak during export. Not sure what values to set? No problem. Simply select from a list of common target loudness presets and let Studio One set the values for you. Presets for every major streaming service are included — from Apple Music to Spotify to YouTube — so there’s no Googling and no guesswork. And of course, you can create your own custom Loudness setting for later use.
Once you’ve set your values or selected a preset, each track on your album is analyzed during export, and loudness and true-peak are brought down to match the standards of the chosen service accordingly. Your tracks will have consistent loudness with the best-sounding songs on your platforms of choice — and listeners won’t be reaching for the volume knob.
New high-end dithering algorithm
Studio One 5.5 features a new, proprietary, custom-designed dithering algorithm that minimizes conversion artifacts and preserves low-level signals. It sounds so good that we’ve replaced Studio One’s previous dithering algorithm with it, so if you’ve got Dithering turned on (in the Advanced Preferences/Audio menu) you’re already using it!
Dithering exists to prevent the harsh-sounding truncation distortion that otherwise occurs when converting digital audio from a high-resolution format (such as a 32-bit float .WAV file) to a lower-resolution format (like a 16-bit .MP3). It’s common practice to conduct mixing and mastering work in a high-resolution format, which of course sounds the best—and later downsample for distribution to meet the format requirements of online distribution and streaming platforms or CD.
Our new dithering algorithm ensures that these conversions will minimize the audible noise, artifacts, and distortion that can be caused by lesser algorithms. And it’s a Studio One exclusive.
Drag and Drop MIDI files to Chord Track to extract chords
Any MIDI file can now be dragged directly to the Chord Track to extract its chords. This works with any .MID file, including MIDI chord packs or any songs in Standard MIDI file format. What’s more, only Studio One’s chord detection works with Audio Events as well as with Instrument Events. It has never been easier to prototype a Song so quickly and simply— and keep your creative spark alive.
Create a strum pattern by dragging notes
You can now create a strum pattern manually by dragging note events in a selected chord while holding the [Cmd+Opt] / [Ctrl+Alt] modifier keys. The notes will be locked to their vertical position (Pitch) and their horizontal position will be spread between the drag start and the dragged note position, allowing you to create strummed chords with a single movement.
Ampire now optimized for fast preset switching on Show Page
Ampire now features improved preset switching for live performance. Switching Ampire presets is now faster than ever and optimized for use with the Show Page, so you can trigger your favorite Ampire presets from a MIDI pedalboard during a show without missing a beat!
Other notable features and improvements
Workflow and Performance
- Automation included in Mix Scenes
- Plug-in Nap option per plug-in
- Remote control Impact XT / Sample One XT sample editors with ATOM SQ and ATOM
- Copy/Paste pads in Impact XT
- Chord Selector: new 2, b5 and #5 intervals (tensions)
- Draw vertical stacks of notes
- Manual time stretching by adjusting Event start
- Option to Snap Event End to grid
- Limit of simultaneously added tracks increased to 500
Project Page
- Tab to rename Tracks
- Option to replace audio on Track
- Default track pause is now set to 0 for new Projects
Show Page
- Detached Performance View for dual monitor use
General
- Improved handling of plug-in processing errors
- Support for Opus audio file format
- Plug-in list in Diagnostics Report
- Display plug-in name and slot on Automation Tracks
- Support for Steinberg CC121 and Tascam Model 12
New Commands
- Project Page – Transform to Rendered Audio
- Project Page – Transform to Real Time Audio
- Score – Toggle Note or Rest
